Contents
- 1 Introduction
- 2 Recipe 1: One-Pot Mexican Quinoa
- 3 Recipe 2: Slow Cooker Beef and Broccoli
- 4 Recipe 3: Veggie Fried Rice
- 5 Recipe 4: Chicken and Sweet Potato Sheet Pan
- 6 Recipe 5: Lentil Soup
- 7 Recipe 6: Italian Stuffed Peppers
- 8 Recipe 7: Spinach and Feta Stuffed Chicken Breast
- 9 Conclusion and recommendations for meal planning and preparation
- 10 Frequently Asked Questions
Introduction
The 7 food recipes that will last you a week allow for easy meal planning and reduce your grocery expenses. These recipes are simple to prepare and store, so you can have healthy and delicious meals throughout the week without compromising your busy schedule. With these recipes on hand, you can enjoy a variety of flavors and cuisines while maintaining a balanced diet.
You don’t have to worry about eating the same thing every day with these seven versatile recipes. Each recipe is packed with nutrients, including protein, fiber, vitamins, and minerals, making them an excellent option for a well-rounded meal. You’ll be able to enjoy diverse dishes like quinoa bowls, vegetable stir fry, lentil soup, roasted chicken breasts, pasta bakes, chili con carne and burrito bowls.
Cooking from scratch is not only healthier but also more economical than eating out or getting takeaway. By taking advantage of these seven recipes that will last you a week, you’re investing in your health while keeping your wallet happy.
According to a study by Ipsos MORI in 2019, preparing meals at home costs less than half the price of dining out in most parts of the world. So why not give it a try? These easy-to-make recipes are perfect for anyone who wants to eat healthily without spending too much money or time in the kitchen.
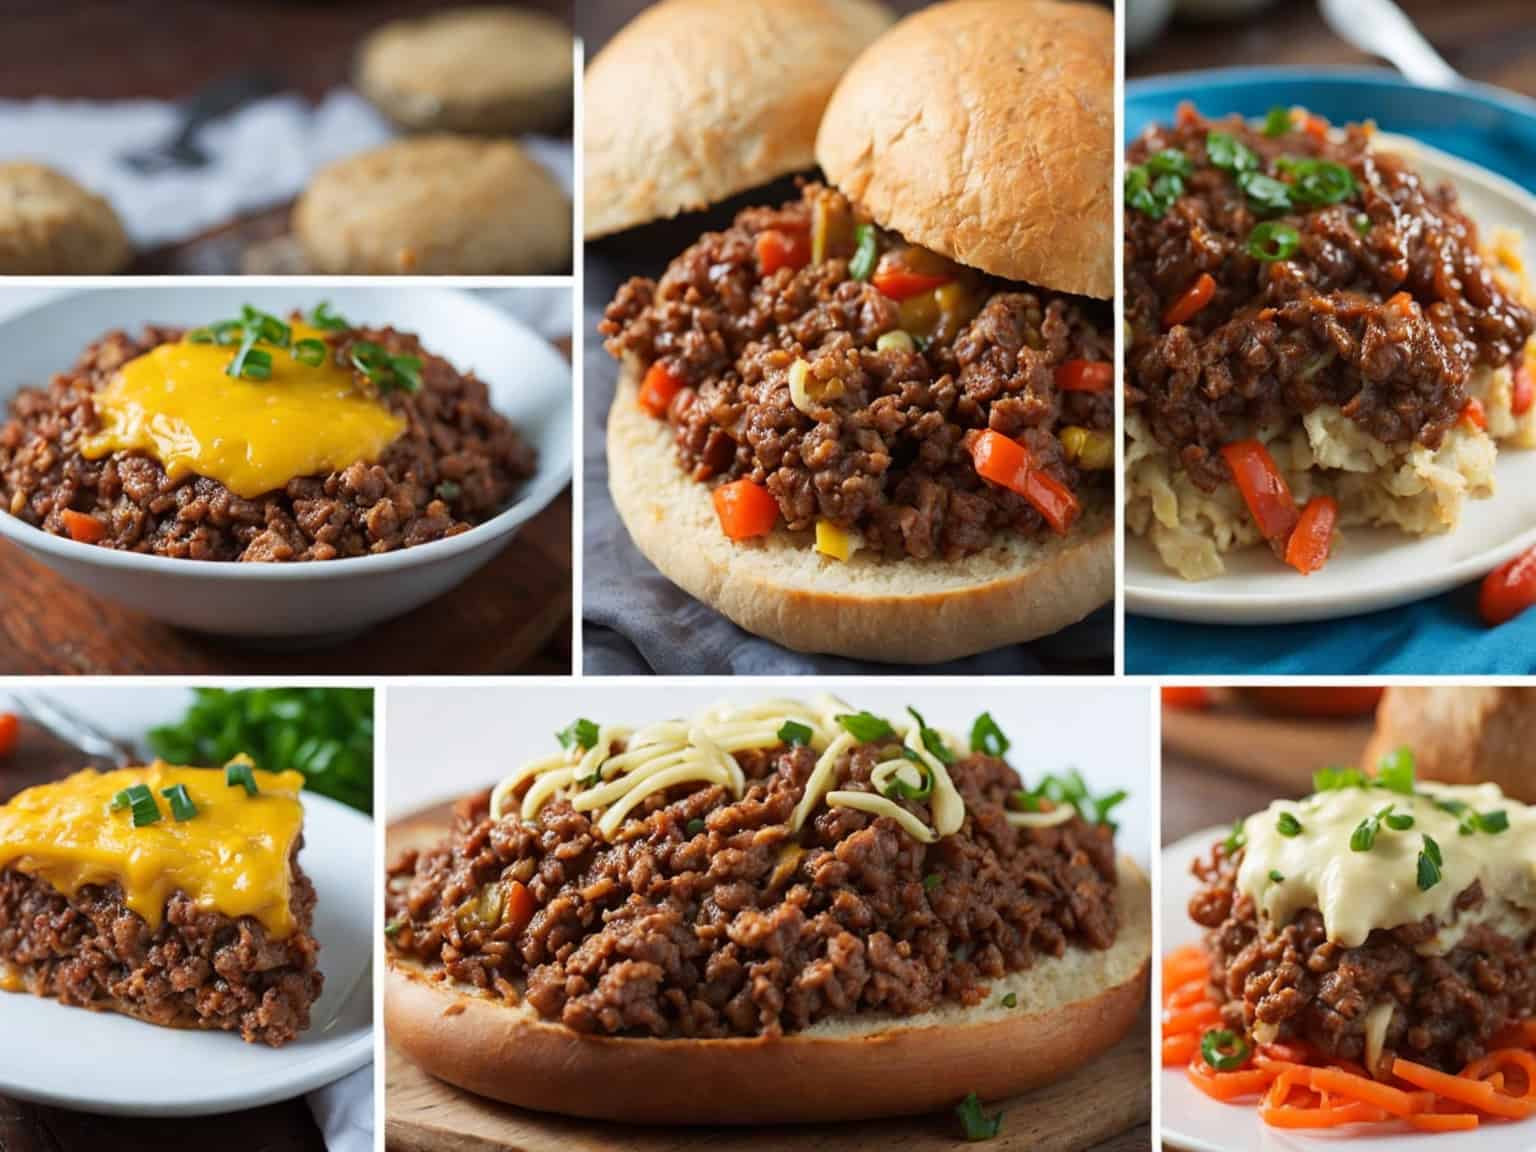
Mexican food without the mess? One-pot and quinoa to the rescue!
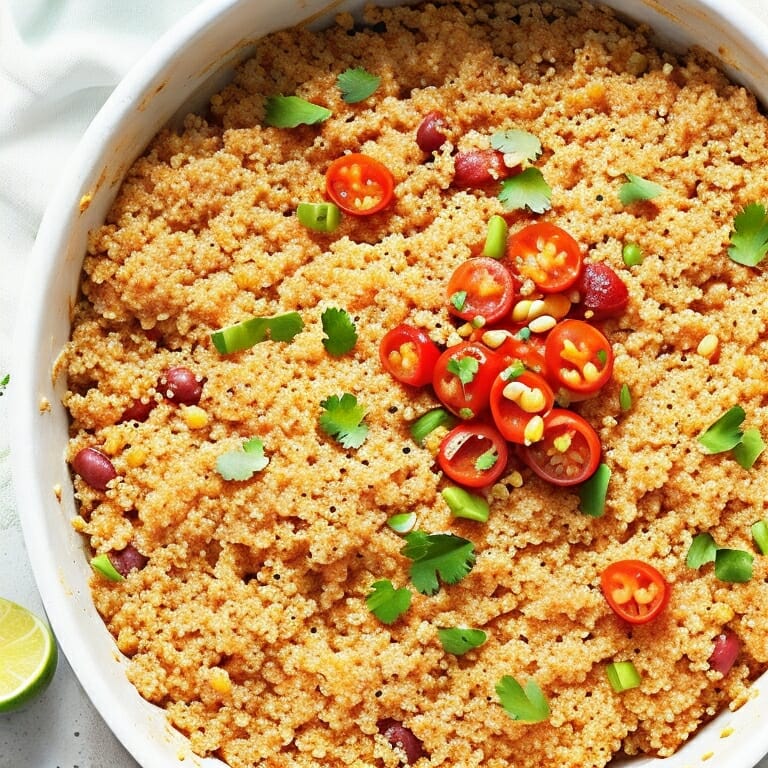
Recipe 1: One-Pot Mexican Quinoa
To make your meal prep effortless and convenient, we present the first recipe of the article, One-Pot Mexican Quinoa. This dish is an easy, healthy, and delicious meal that you can cook in just one pot. In the following sub-sections, you will find the necessary ingredients and cooking instructions, and also storage guidelines for leftovers.
Ingredients and cooking instructions
To prepare this delicious Mexican Quinoa, the ingredients and cooking instructions are as follows:
| Ingredients | Amount |
|---|---|
| Quinoa | 1 cup |
| Oil | 2 tablespoons |
| Onion | 1 chopped |
| Garlic | 1-2 cloves finely chopped |
| Chili Powder | 2 teaspoons |
| Ground Cumin | 1 teaspoon |
| Paprika | 1/2 teaspoon |
| Cayenne Pepper | 1/4 teaspoon |
| Diced Tomatoes | 14.5 oz can |
| Black Beans (rinsed and drained) | 15 oz can |
| Frozen Corn | 1 cup |
| Vegetable Broth | 2 cups |
| Salt | To taste |
After gathering all of the required ingredients, follow these instructions:
- In a large pot over medium heat, add oil and onion. Cook until tender for about 3 minutes.
- Next, add garlic and cook for another minute or until fragrant.
- Add chili powder, cumin, paprika, and cayenne pepper and stir.
- Then add quinoa and stir well to coat with the spice mixture.
- Add diced tomatoes (undrained), black beans*, corn*, vegetable broth* (*rinse black beans before adding*).
- Stir together all of the ingredients nicely and bring to a boil.
- Cover with a tight lid once it reaches boiling point. Cook covered for 20 to 25 minutes or until the quinoa is fully cooked.
- Finally, Add salt if necessary.
As an extra tip, you may serve with fresh avocado or topped with shredded cheese. Did you know that quinoa has been cultivated in South America for centuries? It is known to have high levels of protein and essential nutrients. Nowadays, it has become increasingly popular in the United States and other parts of the world. This recipe is a delicious way to enjoy its flavorful taste and nutritional benefits. Leftovers? More like next day’s excuse to skip cooking and binge-watch Netflix.
Storage guidelines for leftovers
When quinoa is left over, storing it properly is crucial to ensure its freshness and safety for consumption later. Here are guidelines on how to store leftover quinoa:
- Transfer leftover quinoa from the pot or cooker into an airtight container.
- Cool it first before placing it in the container.
- Place the container of quinoa in the refrigerator right away.
- The optimal temperature for storing cooked quinoa is below 40°F.
- Quinoa can stay fresh and safe in the fridge for up to 5 days.
- Reheat only what you need to avoid excessive reheating, as this may affect its texture and quality.
It is important to note that depending on the storage method and environment, leftover quinoa may have varying shelf lives. Proper storage procedures help prolong the freshness and flavour of your leftover Mexican Quinoa.
Did you know that there’s evidence that quinoa has been consumed by humans since at least 5000 years ago? Recordings of Incan people showed them consuming the crop regularly for its nutritional benefits. It wasn’t until recently when their popularity spread outside of South America, with individuals shifting towards more nutritious diets.
Get ready for a slow and steady ride as we beef up your taste buds with this delicious Slow Cooker Beef and Broccoli recipe.
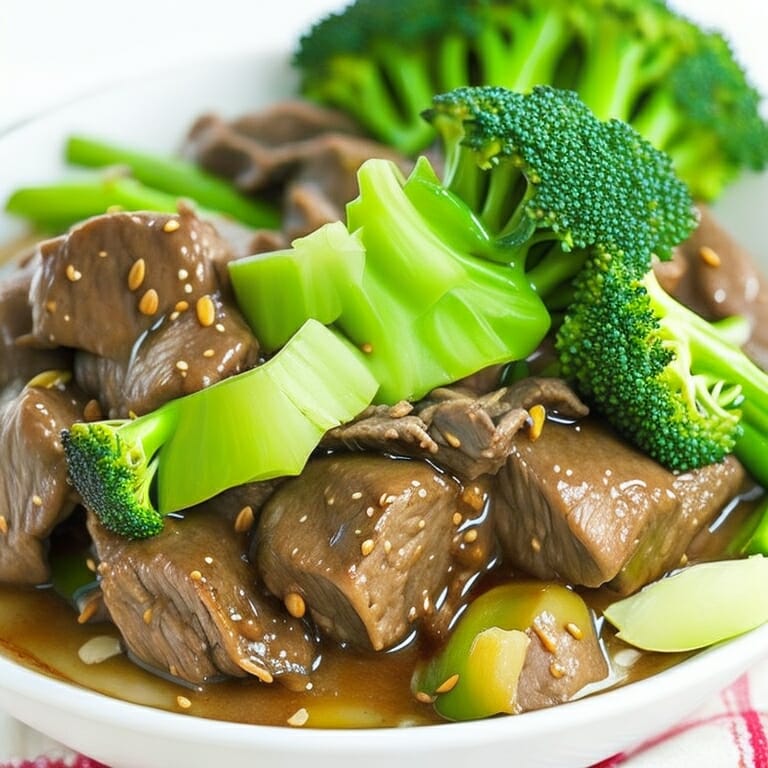
Recipe 2: Slow Cooker Beef and Broccoli
To make your meal prep easier with Recipe 2: Slow Cooker Beef and Broccoli, simply follow the ingredients and cooking instructions. And since this recipe makes enough for a week, you’ll need to know the storage guidelines for leftovers as well.
Ingredients and cooking instructions
Here’s how you can prepare Beef and Broccoli using the slow cooking method:
| Ingredients | Cooking Instructions |
|---|---|
| Beef | 1. Cut the beef into thin strips. 2. In a bowl, mix ¼ cup soy sauce, 2 tbsp brown sugar, 1 tbsp sesame oil, and 3 cloves of minced garlic. Mix in the beef strips, ensuring each piece is coated evenly. 3. Cover the bowl and let it marinate for at least 15 minutes, or overnight in the refrigerator. |
| Soy Sauce | |
| Brown Sugar | |
| Sesame Oil | |
| Garlic | |
| Cornstarch | 4. Once marinated, drain the meat and keep the remaining marinade. 5. Toss the beef strips in 1 cup cornstarch until fully coated. 6. Heat a pan on medium-high heat, add 2 tbsp vegetable oil. Once the oil is hot, add the beef and cook until each piece is browned on the outside. Set the beef aside. |
| Vegetable Oil | |
| Salt | |
| Broccoli florets | 7. In the slow cooker, add 4-5 cups of broccoli florets and the remaining marinade from earlier. Mix well. 8. Add the cooked beef strips and mix with the broccoli and marinade. 9. Cook on low for 2-3 hours or until the beef is tender and fully cooked. 10. Serve hot and garnish with sesame seeds for additional texture. |
For an even more delectable experience, garnish your dish with some sesame seeds before serving to bring out an extra crunchy texture. One time my slow cooker beef recipe turned unintentionally extremely spicy due to accidentally adding double the amount of chili flakes! Only invite people you trust over when experimenting in the kitchen. Leftover beef and broccoli? Don’t worry, your slow cooker will still be the real MVP even after the game is over.
Storage guidelines for leftovers
After enjoying the delicious Slow Cooker Beef and Broccoli, you might want to know how to properly store the leftovers.
- Refrigerate any leftovers promptly within two hours of cooking to prevent bacterial growth.
- Transfer leftovers to airtight containers or zip-lock bags before storing them in the fridge to avoid any potential contamination.
- Leftovers kept in the refrigerator must be consumed within three days to ensure freshness and quality.
If you plan to store it for longer periods, consider freezing the leftovers. Freezing not only prolongs the lifespan but also helps maintain its taste and texture over time.
To prolong the shelf life of frozen leftovers, transfer them into freezer-safe containers with lids or wrap them tightly with aluminum foil or plastic wrap. Properly stored leftovers can last up to 2-3 months.
You can use these tips and tricks when storing all kinds of food products to ensure that they stay fresh and safe for consumption. By following these tips, you can save money by reducing waste while enjoying delicious meals throughout the week.
Who needs takeout when you can whip up this veggie fried rice dish and impress your taste buds without even putting on pants?

Recipe 3: Veggie Fried Rice
To make Recipe 3: Veggie Fried Rice with Ingredients and Cooking Instructions and Storage Guidelines for Leftovers in mind, here’s what you need to know. This recipe is perfect for meal-prepping for the week ahead. In this section, we will discuss the ingredients and cooking instructions, allowing you to whip up a big batch of veggie fried rice. Additionally, we will cover the right way to store your leftovers to ensure they stay fresh for several days.
Ingredients and cooking instructions
The recipe for the Veggie Fried Rice entails the ingredients and instructions required to prepare the dish. Below is a breakdown of the necessary items and procedures.
For the ingredients and cooking instructions, below is a vertically structured table indicating all the ingredients required with their respective measurements and detailed procedures on how to make Veggie Fried Rice.
| Ingredients | Measurements |
|---|---|
| Cooked rice | 1 cup |
| Oil | 2 tablespoons |
| Chopped Garlic | 1 teaspoon |
| Vegetables (carrots, peas, beans) | Half cup each |
| Soy sauce | 2 teaspoons |
| Salt & pepper | to taste |
To prepare this delicacy, heat oil in a pan over medium-high heat. Add garlic and sauté for about 30 seconds. Then add all veggies, salt & pepper to it. Stir fry them until they get cooked and crisp. Now take another skillet; add cooked rice along with stir-fried vegetables. Combine them and mix soy sauce into it. Cook for some more time till they look fried well together.
The rich history of veggie fried rice is traced back to China’s Tang dynasty between 618-907 AD, where meals were prepared by steaming or boiling food in broth served on top of boiled rice which evolved later into cooking preparation of Yangzhou fried rice with egg, meat, vegetables mixed together by Cantonese cooks between late Ming Dynasty to early Qing Dynasty from around year 1644 – 1912 AD which depicted somewhat similar cuisine as the veggie fried rice we know today.
Enjoy your Veggie Fried Rice!
“Leftovers are like your ex, you don’t want them around but you also can’t bear to throw them away – but unlike your ex, you can actually store leftovers properly for future deliciousness.”
Storage guidelines for leftovers
Once you have prepared your delicious veggie fried rice, it’s crucial to store any leftovers properly to avoid spoilage and ensure maximum freshness. Here are some handy tips for storing your cooked leftover rice:
- Transfer the leftover rice into an airtight container as soon as possible after cooking
- Store in the fridge within two hours of cooking
- Make sure the container is tightly sealed to prevent moisture from seeping in
- Label the container with the date of cooking and use-by date, which would typically be three or four days after preparation
- Freeze any portions that won’t be eaten immediately. You can freeze it for up to one month.
- Reheat leftover rice until piping hot before serving. Only reheat defrosted frozen rice once.
It’s worth noting that reheating cooked rice more than once may increase the risk of food poisoning, so it’s best to only reheat what you intend to eat at that time. Pro Tip: To avoid bacterial growth, avoid leaving cooked rice at room temperature for more than two hours, including before refrigeration.
Get ready to taste the perfect combination of sweet and savory with Recipe 4: Chicken and Sweet Potato Sheet Pan.
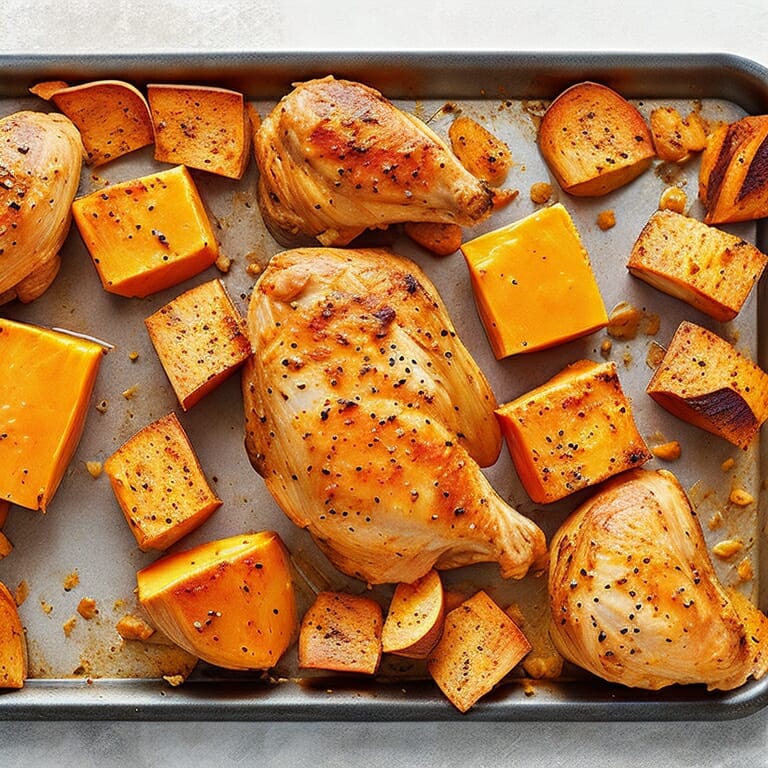
Recipe 4: Chicken and Sweet Potato Sheet Pan
To prepare the chicken and sweet potato sheet pan recipe from the article ‘7 Food Recipes That Will Last You a Week’, follow the ingredients and cooking instructions provided. This recipe offers easy storage guidelines for leftovers.
Ingredients and cooking instructions
To prepare the recipe for Chicken and Sweet Potato Sheet Pan, you will require the following ingredients:
- Boneless Chicken Breasts (4 pieces)
- Sweet Potatoes (2 medium-sized)
- Red Onion (1 large)
- Olive Oil (3 tablespoons)
- Garlic Powder (1 teaspoon)
- Smoked Paprika (1 teaspoon)
- Salt (As per taste)
- Black Pepper (As per taste)
To start the preparation process, preheat your oven to 425°F (220°C) and grease a sheet pan with non-stick cooking spray. Cut the chicken breasts into equal portions and chop sweet potatoes into small cubes along with red onions. In a mixing bowl, combine all the ingredients together and mix well before spreading over the sheet pan. Furthermore, ensure that you bake it for around 20-25 minutes or until the chicken is brought to an internal temperature of at least 165°F (74°C). You can also keep it for more or less time depending on how crispy or tender you want it to be. For best results, serve hot with freshly chopped parsley on top. Enjoy your Chicken and Sweet Potato Sheet Pan! Don’t worry about storing leftovers, this recipe is so good there won’t be any.
Storage guidelines for leftovers
After you have enjoyed the delicious Chicken and Sweet Potato Sheet Pan, it’s essential to store your leftovers safely to avoid spoilage. Here are some tips on how to Store Your Sheet Pan Leftovers!
- First, let the sheet pan cool down completely before storing it in an airtight container or Ziplock bag.
- Second, place it in the fridge within two hours of cooking and keep it there for no more than four days.
- Finally, when reheating, be sure to heat it thoroughly until steaming hot throughout.
It’s important to note that if you’re unsure if your leftovers are safe to eat, be cautious and dispose of them immediately. By following these guidelines, you can ensure that your food stays fresh and delicious.
Lastly, did you know that the concept of storing food dates back centuries? Ancient civilizations used various techniques like drying and smoking meat to prevent spoilage. Nowadays, we have modern refrigeration systems that make storing food a breeze.
Why settle for a boring old bowl of soup when you can experience a flavor explosion with Recipe 5: Lentil Soup?
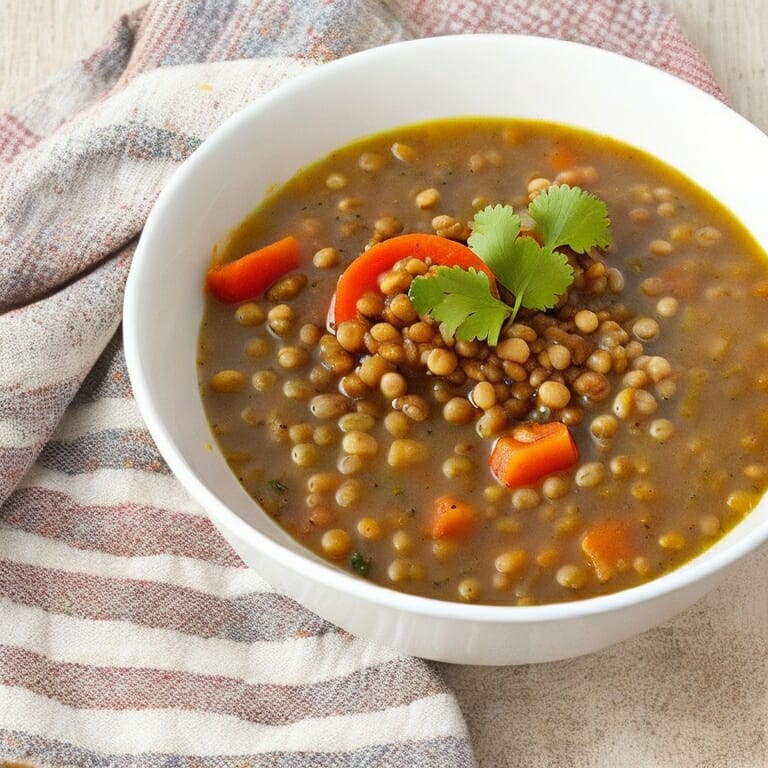
Recipe 5: Lentil Soup
To master the art of cooking lentil soup, you need precise ingredients, diligent cooking techniques, and methods to store the leftovers properly. With the recipe for lentil soup, included in the article titled “7 Food Recipes That Will Last You a Week,” you will learn two essential things – ingredients and cooking instructions, and storage guidelines for leftovers.
Ingredients and cooking instructions
To cook up a hearty bowl of lentil soup, we present the following instructions and ingredients required.
For this recipe, you’ll need a variety of vegetables and spices to achieve the perfect balance of flavor and texture. Refer to the table below for specific quantities needed.
. . .
| Ingredients | Quantity |
| Brown lentils | 1 cup |
| Diced onion | 1 medium-sized |
| Chopped carrots | 2 medium-sized |
| Chopped celery stalks | 2 medium-sized |
To get started, clean and rinse the lentils in cold water. In a large pot, sauté the onion until it softens. Add chopped carrots and celery stalks to the pot, followed by lentils. Pour enough water to cover all ingredients, add spices as per taste, and bring to boil on high heat for 5 minutes before reducing to low heat for 45-50 minutes or until lentils are fully cooked.
Enjoy a hot serving of this warming soup that is loaded with nutrients like protein, fiber, iron, zinc along with endless health benefits.
Don’t miss out on the chance to create a tasty and healthy meal for yourself or your loved ones with this easy-to-follow recipe!
Leftovers are like ghosts, they’ll haunt your fridge until they’re eaten or the apocalypse comes, whichever comes first. Follow these storage guidelines to avoid the former.
Storage guidelines for leftovers
For those with leftover soup, here are some guidelines for proper storage:
- Store in an airtight container and refrigerate within 2 hours of cooking.
- Reheat the soup thoroughly before consumption.
- Check for any signs of spoilage such as smell, change in appearance or texture before reheating and consuming.
- Avoid leaving leftovers out at room temperature for more than 2 hours to minimize the risk of foodborne illness.
- Freeze leftover soup in portion sizes for easy and convenient future meals.
- Discard any leftovers that have been stored for longer than four days.
It is important to note that storing leftovers properly not only prevents waste but also promotes food safety. To ensure safe and healthy consumption, follow these guidelines closely.
Don’t risk missing out on a delicious meal – properly store your leftovers to enjoy later or share with loved ones!
Get ready for a pepper-ific meal with Recipe 6: Italian Stuffed Peppers!
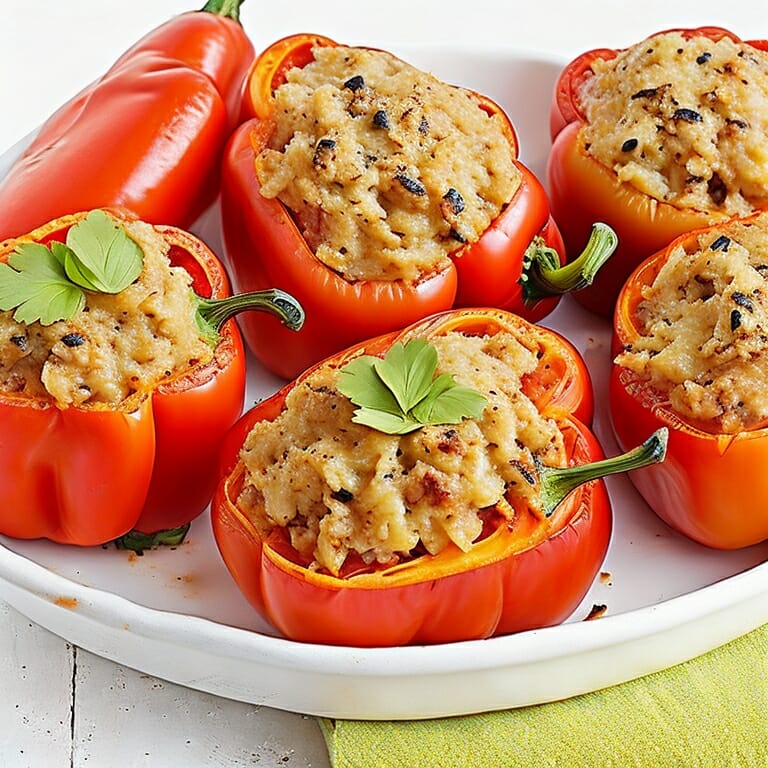
Recipe 6: Italian Stuffed Peppers
To cook Recipe 6: Italian Stuffed Peppers with Ingredients and cooking instructions, and Storage guidelines for leftovers, so you can enjoy a satisfying meal for days to come.
Ingredients and cooking instructions
For this Italian Stuffed Peppers recipe, we have curated a list of necessary ingredients and detailed cooking instructions to help you make the perfect dish.
Please refer to the following table for exact measurements and quantities:
| Ingredients | Quantity |
|---|---|
| Bell peppers | 6 |
| Ground beef | 1 pound |
| Cooked rice | 1 cup cooked |
| Tomato sauce | 15 oz can |
| Chopped onion | ½ cup |
| Minced garlic cloves | 2 |
| Salt | To taste |
| Pepper | To taste |
| Shredded mozzarella | 1 cup |
Carefully follow these steps:
- Preheat your oven to 350°F.
- Cut the tops of the bell peppers and remove all its seeds and membranes.
- In a skillet, cook ground beef, onions, and garlic over medium heat. Drain excess fat.
- Add tomato sauce, salt, pepper and mix well with cooked rice.
- Stuff each pepper with this mixture, place on baking dish.
- Bake until the peppers are tender—around one hour.
- Sprinkle shredded cheese on top of the peppers just before they finish cooking.
You might also enjoy adding some fresh herbs like basil or parsley as a garnish.
Our Italian Stuffed Peppers is a deliciously healthy option for dinner that adds aesthetic value to any dining table.
The origin of stuffed peppers has Ancient Turkish roots modified by middle eastern influences that gradually made it into western cuisine incorporating regional recipes in Europe via migration influence especially in Spain where it was influenced by Mexican cookery during colonial times which resulted in today’s popular recipe with Italian variations.
Don’t worry, these Italian stuffed peppers are so good, there won’t be any leftovers to worry about storage.
Storage guidelines for leftovers
To maintain optimal quality of the food, it is essential to follow appropriate measures for storing the leftovers. Proper Storage Techniques can help to preserve the taste and prevent contamination of food.
- Ensure that the food has been cooled down before transferring into a container.
- Use airtight containers or plastic wraps to seal the leftovers tightly.
- Store in the refrigerator or freezer depending on how long you plan to keep them.
In case you are reheating the leftovers, ensure that they are heated well before consuming. Improper storage techniques can lead to spoilage and losses.
It is worth noting that not all leftover foods can be recycled after storage; certain ingredients lose their texture and nutritional value over time making consumption unfavorable.
I had tried storing leftover Coconut Chicken Curry once for 3 days, but I couldn’t consume it due to its poor taste and odor despite reheating. Finally, I decided to discard it as it was unsafe for consumption.
Spinach and feta stuffed chicken breast: because sometimes plain old chicken just isn’t cheesy enough.
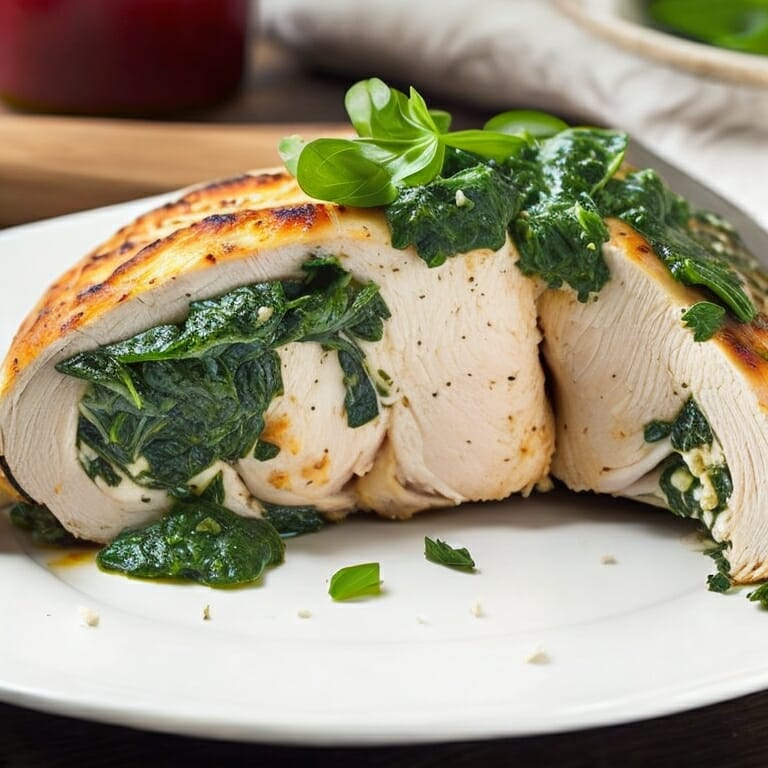
Recipe 7: Spinach and Feta Stuffed Chicken Breast
To make your weeknights easier with a healthy dinner option, try the Spinach and Feta Stuffed Chicken Breast recipe. This delicious recipe is easy to prepare and can feed your family for days. The sub-sections covering the ingredients and cooking instructions, followed by the storage guidelines for the leftovers, will guide you through the entire cooking and storing process.
Ingredients and cooking instructions
For this delectable recipe, we will provide the necessary information for preparing this Spinach and Feta Stuffed Chicken Breast dish.
| Ingredients | Cooking Instructions |
| 4 boneless chicken breasts | Preheat oven to 375°F. Grease a baking sheet. |
| 3 cups fresh spinach leaves, washed and dried | Pound the chicken breasts to an even thickness. Season both sides with salt and pepper. |
| 1/2 cup feta cheese crumbles | In a bowl, mix together the spinach and feta cheese. Spread about 1/4 cup onto one side of each chicken breast. |
| 2 cloves garlic, minced | Tightly roll up each breast starting from the end with the stuffing. Use toothpicks to secure the chicken in place. |
| 3 tablespoons olive oil | Bake the prepared chicken breasts for about 25-30 minutes until cooked through. Set aside for a few minutes before slicing. |
Additionally, it is important to note that this dish is low-carb and high protein making it a healthy yet satisfying meal option. One food enthusiast shared their experience of recreating this recipe at home with ease and received rave reviews from their family who loved how flavorful and juicy the chicken was after trying out this recipe. Leftover spinach and feta stuffed chicken? That’s just an excuse to have another delicious meal tomorrow.
Storage guidelines for leftovers
When you’re done savoring the delicious Spinach and Feta Stuffed Chicken Breast, it’s crucial to store the leftovers appropriately to avoid any health hazards.
- Transfer the leftover chicken into an airtight container immediately after consumption.
- Make sure that the temperature of the refrigerator is below 40°F (4°C).
- Label the container with ‘Leftover Spinach and Feta Stuffed Chicken‘ and include the date of storage.
- The leftover chicken should be consumed within three days of being stored.
- Reheat only once, ensuring that it reaches an internal temperature of at least 165°F (73.9°C).
It’s essential to note that while reheating, ensure that all sides of the chicken are heated evenly to eliminate any harmful bacteria.
If you’re planning on storing the leftovers for more than three days, consider freezing them. Cut them into slices and freeze them separately to deal with as much or as little as you need in each meal.
A study by Harvard Health Publishing suggests that when cooked properly, poultry can provide essential nutrients such as protein, B vitamins, phosphorus along heart-healthy unsaturated fats.
By following these guidelines and taking proper care while storing your leftovers, you can enjoy this delicious recipe without any worries. Your meal planning should definitely include this recipe, unless you want to deal with the disappointment of a less delicious dinner.
Conclusion and recommendations for meal planning and preparation
Planning and preparing healthy meals can be a daunting task, but it doesn’t have to be. With the right approach, you can make meal planning and preparation an effortless task that saves you time and ensures a healthy diet. One effective way is to plan your meals ahead of time – make a list of healthy recipes for each day of the week.
To simplify your meal planning process, choose recipes that are easy to prepare, and can last for a week. This ensures you don’t have to worry about cooking every day or eating unhealthy fast food options during busy days. Additionally, try creating flexible dishes that allow for ingredient swaps which allows better variety.
It’s crucial to evaluate nutritional needs such as personal calorie intake goals or any intolerances you may have while trying new recipes. Working with your dietary requirements helps avoid waste whilst still being efficient with grocery shopping and the health benefits.
Explore new cuisines by experimenting with different flavor combinations and styles. This offers variety in planning and keeps things interesting. Revisit old favorites recipes occasionally too.
Don’t let meal planning overwhelm or intimidate you; instead practice consistency by incorporating good habits over time. By focusing on simple solutions like pre-planned weekly lists, applying “what-if” scenarios as well as exploring different ingredients regularly is key.
Efficient meal planning saves time and ensures necessary nutrition with lesser chances of food wastage whilst retaining variety in one’s choices especially those we may not readily think about incorporating into our meals initially such as fruits or leafy greens. Make use of online resources finding endless possibilities enabling exploration into new recipe ideas. Defiantly say NO to bland diets by expanding your horizons. Avoiding possible unwanted pestering at work or home due to hunger cravings can greatly improve productivity levels throughout ones day!
Don’t miss out on the opportunity to achieve a healthier lifestyle through effective meal planning!
Frequently Asked Questions
Q: What are some easy meal prep recipes that can last for a week?
A: Some great options include chili, stews, casseroles, lasagna, quiches, and roasted veggies with chicken.
Q: How can I ensure that the food will last for a week?
A: Make sure to store food in airtight containers in the fridge or freezer, and always check the expiration dates of your ingredients.
Q: Can these recipes be easily adapted for a vegetarian or vegan diet?
A: Absolutely! You can substitute meat and animal products with tofu, tempeh, legumes, and a variety of veggies to make these meals plant-based.
Q: What kitchen tools do I need to prepare these recipes?
A: Basic kitchen tools like a cutting board, knife, skillet, pot, baking dish, and oven will be sufficient for all these recipes.
Q: Are these recipes budget-friendly?
A: Yes, most of these recipes use affordable ingredients like beans, rice, pasta, and frozen veggies. Plus, cooking in bulk can save you money in the long run.